
How to Mount System as Read-Write on HTC One M9 (TWRP Recovery)
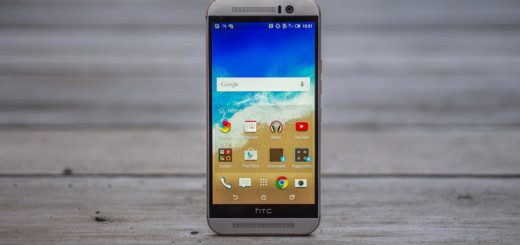
Is HTC One M9 your new and shiny smartphone? Great choice! We can tell you from the start that when it comes to the design, this is the most exciting element of the HTC One M9. HTC is calling it “jewellery-grade” with each piece being hand-finished by craftsmen and we can certainly see that. It really doesn’t matter the color that you choose, but they all look impressive and they are all easy to hold and carry.
This is also one of the few flagship phones from the current market to feature expandable storage, not to mention that it is included in a unique one-year replacement program in the US. The resolution is of “only” 1080p, but maybe you don’t even need a sharper QHD resolution that could affect the battery life and drain all its juice in a matter of hours how it happens with Galaxy S6, for example (read: How to Maximize Battery Life on Galaxy S6).
Isn’t this the ideal smartphone? However, with HTC’s decision to move to block-based system in terms of Android OTAs for the HTC One M9, it seems that we have a problem and the usual version of TWRP recovery could no longer work. The developers had to come up with a fix in 2.8.6.0 in beta version, wherein system isn’t mounted as read-write, and kept as read-only. This lets the stock system partition untouched, thus facilitating the backup of it, but if you want to root One M9, or install a custom ROM or any other mods, you may get an error regarding the system’s status as read-only.
Read:
Easily Root HTC One M9;
Update HTC One M9 with Custom ROMs.
In such cases, you have only one solution left: to mount it as read-write, but it’s not that easy as it’s with normal version of TWRP recovery. Under beta version, system doesn’t show up under Mounts screen, which means that there is no GUI available to change the mount status. What you need to do is issue a command in ADB that would mount the system as read-write. Before starting, you have to back up the stock system partition (do not skip this step) and you can also back up the stock recovery. And make sure have installed the beta version of TWRP recovery on your One M9 device or the procedure won’t work.
How to Mount System as Read-Write:
- Power off your One M9 handset;
- Press and hold Power and Volume down buttons together until you boot into download mode;
- Use the Volume buttons to move the highlight to reboot to bootloader, as well as the Power button to select it;
- In bootloader mode, you have to move the highlight to boot to recovery mode and use the Power button to select it to boot into recovery mode. You’ll enter TWRP recovery now;
- In TWRP, choose Advanced;
- After that, select Terminal Command;
- Tap on Select to issue command in root folder;
- You’ll get to terminal window now. Type the following command: “mount -t ext4 /dev/block/bootdevice/by-name/system /system”;
- Hit Enter and that was all.
Starting to this moment, be sure that you can flash your root file, or any other custom ROM that you might want. They should install with no problems.


duuuude worked on a nexus 5 cause i accidentaly selected read only when installing twrp for first time, now every time i boot into recovery mode it goes straight to twrp and not the stock recovery anymore. thanks a lot :D i was desperate to find a solution for this.
May I know what you did exactly?
I just installed TWRP and I can’t boot to the system
I just installed TWRP and I can’t boot to the system
Can someone tell me what to do?