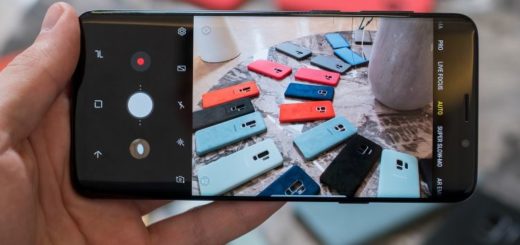
Easily Use the HTC One M9 Camera Interface
The third-generation HTC One was officially introduced in a press conference at Mobile World Congress on March 1, 2015 and it was released to wide retail availability on April 10, 2015.
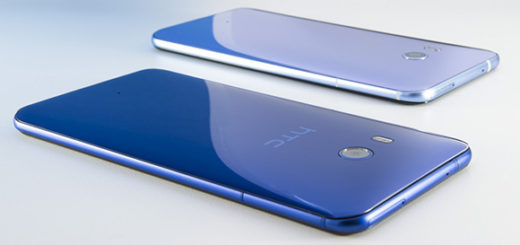
Is the successor to the previous year’s One (M8) your choice as well? Then, I bet that you are eager to find out as much as possible about this camera and about its interface as well. You are probably no stranger of the fact that the original HTC One and One M8 used UltraPixel sensors for their main cameras, with low-res brains in order to deliver great images, particularly in lower light, but the company’s attempt can be considered a failure, so that is why the strategy is different this time.
We still have an UltraPixel sensor, but it’s on the front side, while the main camera is now a 20-megapixel sensor, one of the highest-res models around.
This change is more than welcomed, but is the HTC One M9 camera interface different as well? Do you still know how to use it (especially if you have previously owned a HTC device) or do you need help? I have the answer to all your questions on this topic, so don’t hesitate to continue reading:
Use HTC One M9 Camera Interface:
I want to be clear about something from the very beginning: the new 20-megapixel sensor is indeed a huge change (learn how to use this new camera), but despite of that, the camera app hasn’t really changed much. Don’t get me wrong; this is not a complaint, as it has already proven its worth. So, I can assure you of the fact that if you have previously used the company’s M7 or M8 models, then you won’t have too much to learn and you’ll find a familiar look from the start.
The camera interface includes, just as always:
- Status area – this specific area is the one that will show you if features such as the flash are turned on or not;
- Menu – use this change the camera scene or adjust settings for the camera;
- Shutter – do not hesitate to tap it when you want to capture a shot or to hold it in order to take a burst shot:
- On the Home screen, tap the camera icon to open the Camera app;
- Then switch to Camera mode, if you’re not in this mode already;
- Point the camera at what you want to capture;
- When you’re ready to take the photo, just use the Shutter.
- Record – are you prepared to start recording a video? This is what you have to do:
- Open Camera from the lock screen or Home screen;
- After that, simply switch to Camera mode.
- When you’re ready to start recording, tap Record;
- Change focus to a different subject or area by tapping it on the Viewfinder screen;
- Tap Flash to turn the flash on or off;
- Tap Pause in order to pause the recording, and then tap Record to resume;
- Tap recording done if you want to stop recording.
- Gallery – tap this to see pictures you’ve already taken.
Do you see how easy is to use the interface?