Take Scrolling Screen Shots on Android via Stitch & Share
Many of the latest Android flagships have a dedicated feature for taking long scrolling screenshots of whole websites or apps. However, many of us don’t own some of these devices, but still want to capture long screenshots. If you find yourself in this category too, then you should know that there are a number of third party apps that try to mimic the scrolling screenshots functionality from the likes of MIUI and Oxygen OS.
Even if I strongly believe that none of the apps bring you an experience as good as you get on natively supported platforms, it’s close enough, so why not giving it a try? Stitch & Share is such an example of an app that allows you to take screenshots as you normally would. Then, this app will automatically recognize the screenshots and stitches them into one long image. You just need to make sure that you take overlapping screenshots.
Just note that Stitch & Share comes in a free version, yet once you have it on your Android you can make an in-app purchase and get some advanced features, as well as an ad-free experience. And you must know about that small watermark that will appear on the bottom right unless you upgrade to a paid version, yet the choice is only yours.
Take Scrolling Screen Shots on Android via Stitch & Share:
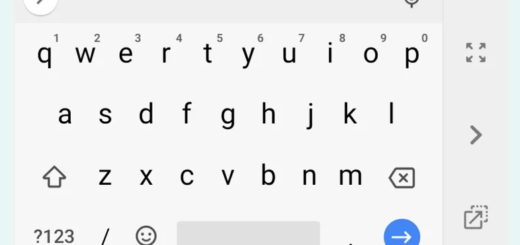
- First of all, download and install the Stitch & Share app from the Google Play Store;
- Once you do that, installed it;
- Now, you can run the app;
- You can do two things: first of all, you can choose automatic capturing and let the app do things for you, while you carefully scroll through the area or you may also capture individual screenshots on your own and then combine them using the app.
For Automatic Capturing:
- If Automatic Capturing is your choice, tap to “Automatic capturing”;
- Then, press the “Automatic screenshots” card. You will be prompted to start the service, so press Start now. This will allow you to take scrolling screenshots by simply tapping the cast icon;
- After that, you will need to give the app accessibility permissions so that it can determine the scrolling distance. Just tap on “Accessibility Service” and like that, you will be taken to the Accessibility settings;
- Here you must toggle the switch to On;
- Go back to the app screen and tap on Start automatic capturing. As soon as you do this, an overlay cast icon will appear on the screen;
- So, go to app window where you would like to capture the screen;
- Don’t hesitate to tap on the cast icon to take scrolling screenshots;
- You will need to gradually scroll and wait for it to take the screenshots. The preview will be displayed on the left edge of the screen;
- When it’s done, tap on the cast icon again to save the screenshot. The app window will open along with the screenshot, for you to share it.
For Capturing and Combining Individual Screenshots on your Own:
- Capture your first screenshot as you normally do;
- Scroll down within the app, keeping a small portion of what was in the first screenshot visible, then capture the next screenshot;
- Just repeat the previous steps until you’ve captured everything you want in the screenshot;
- Now, you can open the Stitch & Share app;
- Then, just tap on “Combine screenshots”;
- It’s time to select the individual screenshots and the app will do the combining for you;
- The end result will be provided on the screen for you to share.