
How to Root OnePlus One in a minute
OnePlus One has been internationally released on 23d of April of this year, so we are sure that many of you already have this smartphone in their pockets thus root access must be granted.
Are you also one of them? Then, you probably enjoy its 5.5 inches Full HD with a resolution of no less than 1080 x 1920 pixels, its 2.5 GHz Snapdragon 801 CPU coupled with a storage memory of 16GB or 64GB depending on the terminal, also having a generous 3100 mAh battery and both a 13 megapixels rear camera and a front camera of 5 megapixels.
Moreover, OnePlus One comes with CyanogonMod 11S ROM based on Android 4.4 KitKat and this is a major attraction for so many of us, but if you want even more, the advantages that come along with the rooting procedure are more than tempting.
So, after rooting your OnePlus One, you will immediately free up storage space by removing all those apps and services that were preinstalled by your carrier/manufacturer on the handset, you’ll increase performance with various Tweaks & Mods available for this phone and increase battery life, not to mention that this is your chance to update to a new version of Android with Custom ROMs or to flash various custom ROMs for better performance.
But don’t start the root operation before taking in consideration that below are some warning that you must be aware of. You are ready to root your OnePlus One only after knowing the consequences of such a procedure, so do not hesitate to read what we have prepared for you:
Review the risks:
- Rooting your handset will most likely void its manufacturer’s warranty; we know that the idea doesn’t sound at all great, but we also have a solution for you: don’t forget that you can restore it by using this step by step tutorial;
- We know cases when the carrier restrictions interfere with the rooting process; if this is your case as well and the rooting process doesn’t work, you can try to uninstall the stock ROM and all the current carrier restrictions will be eliminated as well;
- Remember that this tutorial is only compatible with OnePlus One – we have told you that from the start. In these conditions, we strongly advice you not to try it on any other device or there is a big risk to damage it or even brick it and this is not our fault;
- You might not receive any future official software or firmware updates after rooting the phone; are you ready to accept that?;
- Rooting can be a tricky procedure, especially if you have never done anything like that before, so pay attention to all the following instructions and don’t skip any step;
- We are not responsible for any damages caused to your OnePlus One handset by this rooting method. We are telling you once again that any action is done under your responsibility. So, if you have any question or if you need additional support, this would be the perfect time to use the comments area and prevent the unfortunate situation of bricking the device.
Preparatory steps:
- Start the preparatory steps by making a full backup of your SMS and MMS messages, your contacts, images, videos, files, APN and MMS Settings and other data that might be important for you; this is a necessary step as the rooting operation will most likely wipe all your OnePlus One data;
- You’ll need computer or a notebook in order to apply the procedure; don’t forget that here you must temporarily uninstall the security protection which can interfere with the rooting process;
- Use only the original USB cable to establish the connection between the computer and your OnePlus One handset;
- Also make sure that you have already installed the appropriate USB drivers or the procedure has all the chances not to work and we are sure that this is not what you want;
- Go to ‘Settings > Applications > Development > USB debugging’ in your device and enable the USB Debugging Mode;
- Make sure that you have the latest version of CWM or TWRP recovery installed on your handset; if youalready have it, just go to the next step;
- And there’s one more aspect that you should take care of now: your OnePlus One phone must be is at least 70% charged or it could easily power off during the procedure. In the beat case, you’ll need to start all over again the rooting operation, but there is also the risk to brick it.
Are you ready to begin? Good luck!
How to Root your OnePlus One:
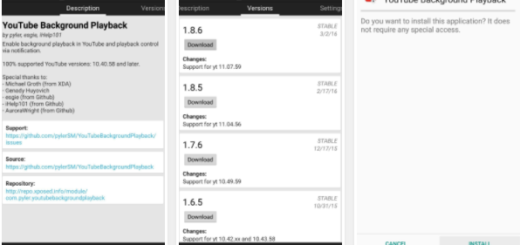
- Download SuperSU zip file (UPDATE-SuperSU-xx.xx.zip) directly from here on your computer;
- After the dowlad is complete, you must connect your to OnePlus One PC and move SuperSU zip file on the device;
- Disconnect the phone from PC;
- Reboot it in Recovery Mode (in order to do so, you need to press and hold Volume Down and Power button at the same time until you see Recovery Mode. If this doesn’t work, then you must type ‘adb reboot recovery’ in CMD);
- In Recovery Mode tap on Install and select the SuperSU zip file (UPDATE-SuperSU-xx.xx.zip) and then confirm your action;
- After the installation is completed, you have to return to main menu of Recovery Mode and select ‘Reboot system now’.
Congrats!! Your OnePlus One is successfully rooted, just as you have wanted from the start.
And if you face any type of problem during this tutorial, let us know and we’d be glad to help you.


I just habe done it but when i want to use xmodgames, they say that i haven’t any rootpermissions
no this just installs supersu uh ?
It installs the binary which is how u root a phone – its all u need
my device says cant verify signature verification
Can anyone tell me what to do? this happens when i try to instal the superSU zip file