How to Root Moto X running on Android 4.4.2
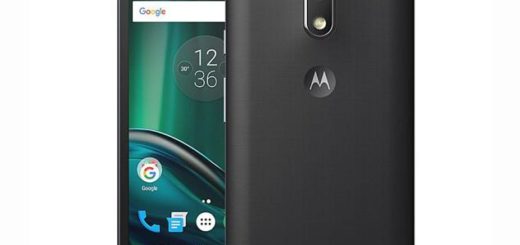
Motorola’s Moto X is a device released in August of last year and although its specs might not necessarily be amazing, they are certainly decent enough to be taken in consideration – though along with root access you can improve these performances. Than handset has a 4.7-inch screen with a curved back, as well as a 10-megapixel camera and 16GB or internal memory, so you see of what we are talking about.
If you want to root your Moto X, the idea is great as long it lets you overclock your phone’s processor, to delete unwanted pre-installed applications, as well as to install a custom ROM. We all know that a custom ROM is not an official one, but it can be just what you need, with no bugs and plenty of new features that are not found in the official ROM, so don’t hesitate to root your handset.
However, many have failed rooting Motorola’s Moto X on Android 4.4.2, but someone has finally found a solution. We are talking about JCase, a recognized developer from XDA community who is offering us a root package known as Pie that can solve the rooting problems found.
Review the risks:
- You should know from the start that the root access obtained by the Pie is not a permanent root and it doesn’t come with complete functionality. So, in these conditions, the only thing that work are the root and busybox, but you do not get system write access, so writing files to /system partition is not possible, but this has an explanation. Better said, the rooting method used in this case is nothing else than a tethered root (tethered jailbreak), so root permissions will also last as long as you don’t reboot your Moto X;
- Rooting your device will void its manufacturer’s warranty, but you can easily restore it by simply applying the tutorial that we have also prepared for you;
- This method of rooting can be applied only to Motorola’s Moto X handset model, so don’t try this in any other Android device;
- Be prepared to stop receiving future official software or firmware updates after rooting your device; this is what this procedure does;
- If something bad happens to your device, we cannot be held responsible for that; the story goes the same for JCase that has made it clear that the rooting procedure given here is not ideal. You are the only one that can take a decision and assume the responsibility for your facts taking in consideration that this is the only root method available for the Moto X on locked carrier devices, but it also comes with these risks.
All the following preparatory steps are very important and must be followed before proceeding to rooting guide:
Preparatory steps:
- Backup important data and settings in case of wanting to use them after the rooting operation;
- You’ll need computer or a notebook for this rooting procedure, so take care of this aspect now;
- Prepare the original USB cable if you want to establish the connection between the computer and the phone;
- Install the USB drivers for your device on your computer before starting the procedure or we can assure you that it won’t work;
- Disable the security protection from both the PC and your Motorola’s Moto X as long as there are big chances to slow down or even stop the rooting operation;
- Do you have the latest version of CWM or TWRP recovery installed on your Motorola Moto X phone? Take care of that now;
- Turn on USB Debugging mode, by going to ‘Settings-Developer Options-USB Debugging’;
- Don’t hesitate to check battery percentage; the handset should have at least 70% battery power left if you successfully want to complete the procedure.
All set and ready for the rooting operation? Let’s start by carefully following the given steps:
How to Root your Moto X running on Android 4.4.2 uisng Pie root:
1. Download the ADB+Fastboot file from here, as well as the Pie Root Package from here;
2. Connect your Moto X to the PC by using the original USB cable;
3. After your PC recognizes the phone by checking for the device in device manager, you must extract the ADB+Fastboot files to a folder on your computer (and install the USB drivers in case you are using a Windows PC);
4. Now, it’s time to extract the contents of the root package to the same folder where you have previously extracted the ADB files;
5. Hold the SHIFT key on your keyboard and RIGHT CLICK and then select ‘Open command window here’;
6. Paste the following commands in the command prompt one by one in order to root your Morola Moto X:
‘adb push pie.jar /data/local/atvc
adb push root.sh /data/local/atvc
adb shell chmod 755 /data/local/atvc/root.sh
adb shell /data/local/atvc/root.sh’
7. The output on the command prompt will be like this:
‘Retina:package jcase$ adb push pie.jar /data/local/atvc
5288 KB/s (1538203 bytes in 0.284s)
Retina:package jcase$ adb push root.sh /data/local/atvc
81 KB/s (137 bytes in 0.001s)
Retina:package jcase$ adb shell chmod 755 /data/local/atvc/root.sh
Retina:package jcase$ adb shell /data/local/atvc/root.sh
pie by jcase
want to buy me pie? paypal-> [email protected]
Retina:package jcase$ adb shell
shell@ghost:/ $ su
root@ghost:/ # id
uid=0(root) gid=0(root) context=u:r:kernel:s0’
That as all that you had to do! Was it such a difficult procedure?
And don’t forget that rooting will be lost when Moto X is rebooted, so think about that next time when you are about to do the rebooting operation.