How to Speed Up Chrome for Android

Let me be clear from the start about the fact that I find Chrome on Android as being a simply great default browser. The advantages coming along with Chrome are numerous: it utilizes less RAM, it runs smoother than several other browsers and it offers you the possibility to enjoy unlimited apps and games in your Google Chrome browser.
However, there are times when you can find it difficult to load pages as fast as you might want and browse smoothly enough, especially if your phone isn’t exactly a new one and also equipped with no more than 1GB of RAM memory (or even less than that) or if you are running on the new Material design update.
It is up to you to install a new default browser. In fact, I actually encourage you to do that! Anyway, after giving a try to other options such as Firefox, Opera and not only, there are pretty big chances to miss Chrome. Its simplicity cannot be compared to anything else and I am not the only one thinking that! In such a case, my advice is to stop wasting your time with useless searches and enjoy a guide on how to speed up Chrome for Android in order to get a better overall Chrome experience.
Well, there is no mystery that by default, the Chrome browser is limited to no more than 64 MB of RAM usage. The trick is that you have to change this limit in order to get a much more responsive experience. I also want you to know that this procedure is a little bit risky, especially if you’re thinking about selecting the maximum RAM value. Such a decision means that your browser will have to use more memory from your device which might make it sluggish.
How to Speed Up Chrome for Android:
- Launch Google Chrome on your Android handset;
- After that, you have to tap on the address/search bar to access the writable area;
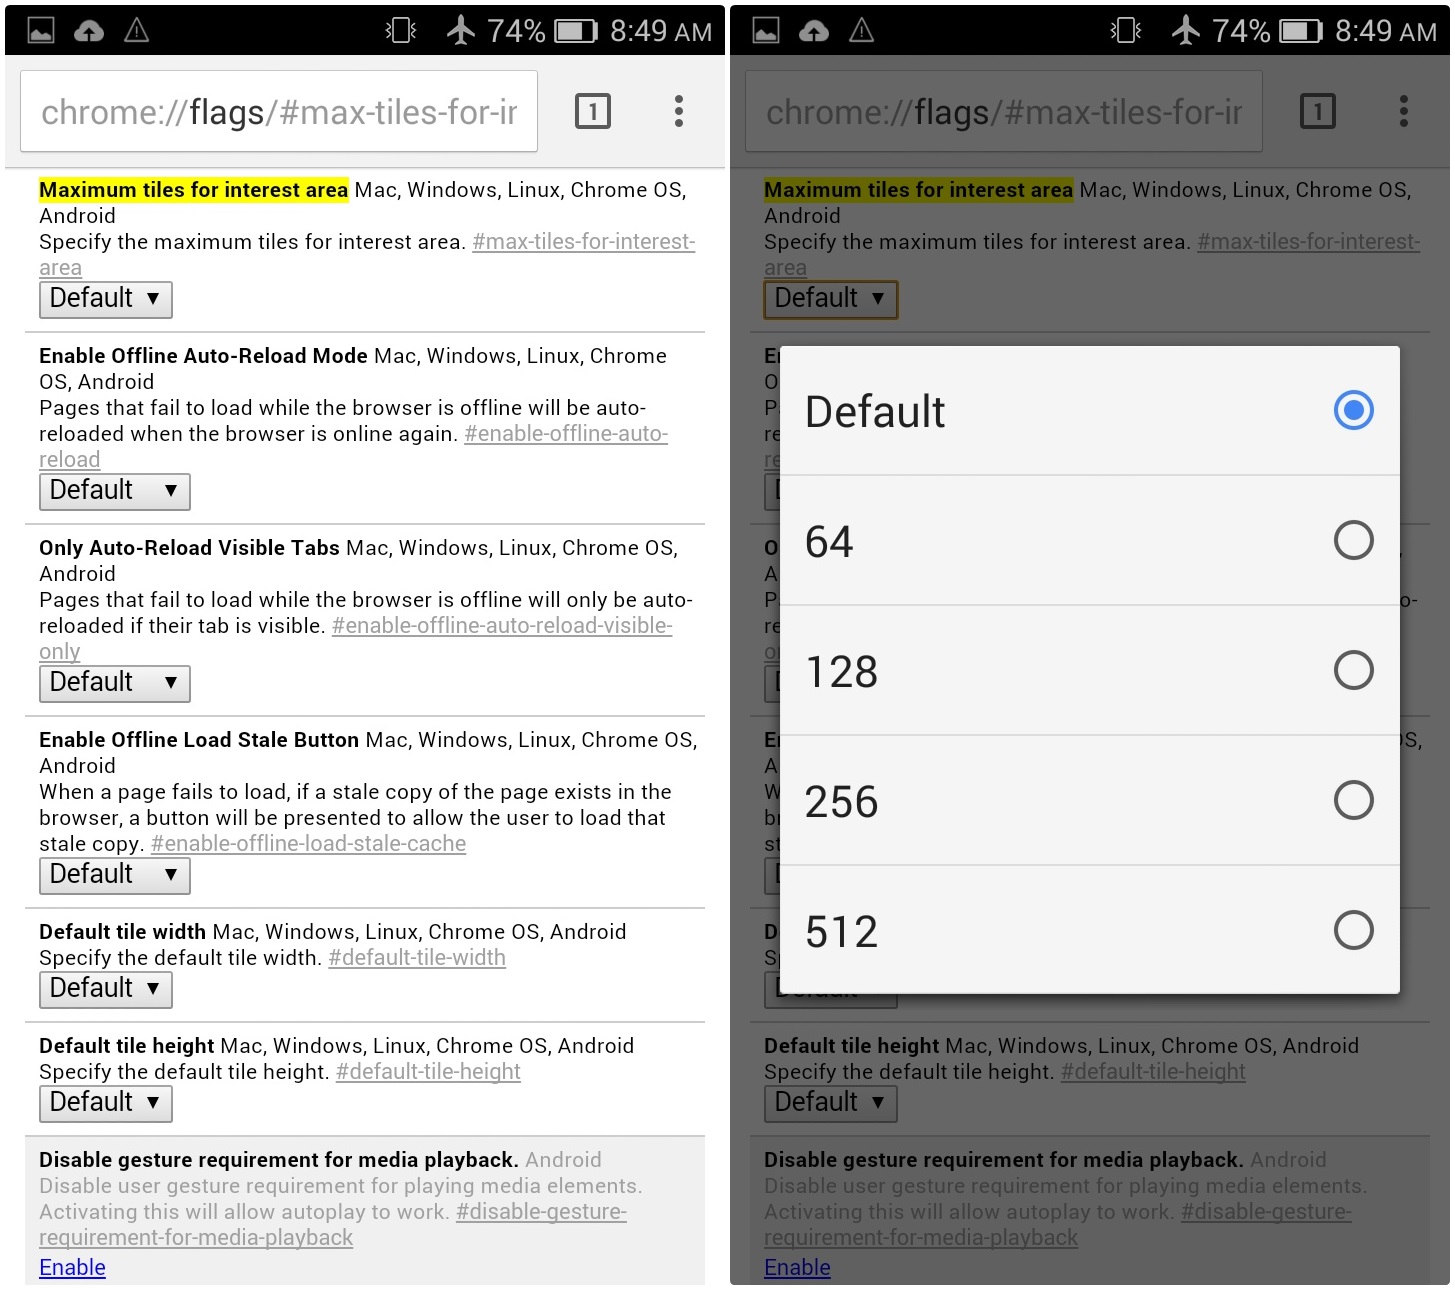
- Then, don’t hesitate to type the following code: chrome://flags/#max-tiles-for-interest-area;
- Tap Enter;
- On the new page, you have to scroll down, until you find an option which is called Maximum tiles for interest area – this is the one which gives you the possibility to change the amount of RAM you have allocated to Chrome;
- Now, it set to Default, but there is a little drop-down menu which lets you select the amount of RAM allocated. The options that you can choose from are of: 64, 128, 256, as well as 512 MB;
- If you know that your Android device can handle 512 MB processes of Google Chrome, then choose it. After all, there are handsets with 2 or even 1 GB RAM which can use this option;
- If this is too much for your phone to handle, then the 256 MB option is the one recommended, not to mention that even the 128 one is much better than the default value;
- After making your choice, you will be required to restart Chrome for Android (you can just use the one-tap option to re-launch it) and that was all! Just enjoy the change of a lag free Google Chrome browser!
Have you been successful? Don’t forget to tell me more in the discussion thread below, including any potential problem that might stop you from finishing this guide.


User forum
0 messages