How to Install Deodexed & Debloated Stock ROM on AT&T Galaxy S7

Here I am with a fresh guide for all AT&T Galaxy S7 users. It seems that a popular XDA member has this smartphone too, so he has prepared a surprise for us. I am talking about muniz_ri who has repackaged a ROM that will update your S7 to the firmware version PF2 while retaining root access.
You should know from the start that this special ROM is not only deodexed, but debloated as well, so this is practically your chance to get rid of all unnecessary system apps from Samsung, AT&T and Google that you will never use.
If you follow the operation here presented, let me tell you that the Modem, Non-hlos, System, Kernel, Recovery, and the Bootloader of your AT&T Galaxy S7 handset will be updated. Even better, you don’t even have to wipe anything before flashing the ROM because the process will automatically wipe all user data on your phone.
However, there are still a few important things to take in consideration before taking the updating operation. First of all, you have to take a backup of al your important data (you may use these guides on How to Backup and Restore IMEI / NVRAM Data on Android Devices or How to Enjoy Backup in Android Marshmallow) to prevent any potential accident and don’t hesitate to plug in the charger. Better waiting a little longer to start the procedure than ending up with a bricked handset, don’t you think?
Even more, this operation will not affect your Knox Warranty Flag, but you still have to be careful about each step that you are taking. And don’t forget to enable USB Debugging on your Galaxy S7 and make sure that you have Samsung’s USB Drivers or Samsung Kies installed on your computer.
How to Install Deodexed & Debloated Stock ROM on AT&T Galaxy S7:
- Take the G930A_PF2_Stock_DeOdexed_Debloated_ROM.zip to your computer by using this link;
- Copy the file to your device’s internal storage with the help of the original USB cord;
- Download and install the FlashFire app from the Google Play Store; you can use this direct link to take it;
- Open the FlashFire app;
- Then, tap “Agree” to the Terms and Conditions prompted by the app;
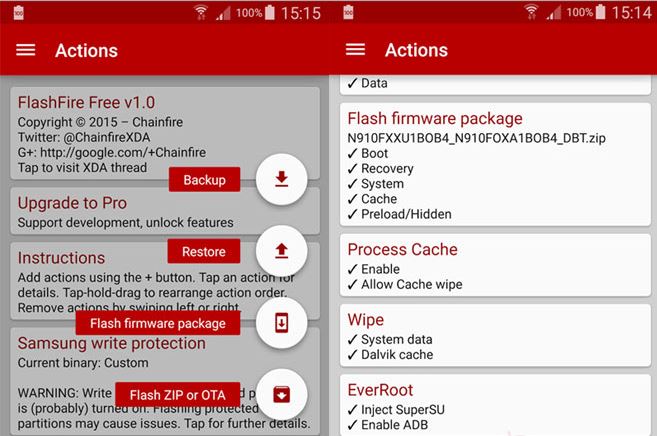
- Press the rounded “+” button twice in order to bring up the Actions menu.fireflash-app-android;
- Hit the Flash Zip option;
- Then, choose the G930A_PF2_Stock_DeOdexed_Debloated_ROM.zip;
- Verify that the Auto-mount is unchecked (you can find it under the Options menu);
- From the main menu, you have to uncheck all options under EverRoot;
- Set the Reboot settings to Download;
- Then, tap the Lightning bolt icon followed by OK to begin the installation;
- When the installation is finished, your device will reboot automatically into the Download Mode;
- Now connect your phone to the PC with the help of the original USB cable;
- Now, it’s time to take Odin from here;
- Launch it;
- Click the PDA/AP button in Odin and select the G930A_PF2_Stock_Modem_Recovery_Bootloader.tar.md5 file;
- Press the Start button to begin the installation and have patience while things are taking their course;
- As a last step, your AT&T Galaxy S7 will automatically reboot.


User forum
0 messages