
Android: How to Turn On Hotspot (Complete In-Depth Guide)
![]() Updated on
Updated on
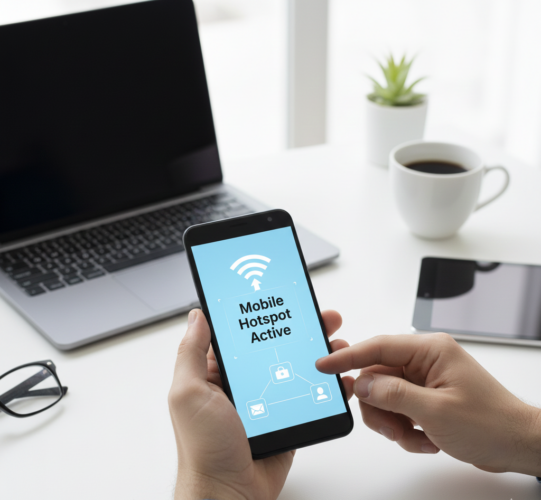
Turning your Android phone into a portable Wi-Fi hotspot is one of the most useful features built into the operating system. Whether you need internet access for a laptop, tablet, or another phone, Android’s hotspot (also called tethering) lets you share your mobile data securely and quickly.
This guide walks you through everything you need to know—from basic setup to advanced settings, troubleshooting, and security best practices.
Why Use a Mobile Hotspot?
- No Wi-Fi Available: When you’re in an area without public Wi-Fi or your home internet is down.
- Connecting Multiple Devices: Ideal for sharing your data with a laptop, tablet, or even another smartphone.
- Security: Using your own hotspot is generally more secure than connecting to unencrypted public Wi-Fi networks.
- Work on the Go: Stay productive by connecting your laptop to the internet from almost anywhere.
Before You Begin: Important Considerations
- Data Usage: Using your hotspot consumes your phone’s cellular data. Be mindful of your data plan to avoid overages, especially if you have a limited plan. Streaming videos or downloading large files on connected devices can quickly eat up your data.
- Battery Drain: Running a hotspot uses a significant amount of your phone’s battery. Consider connecting your phone to a charger if you plan to use the hotspot for an extended period.
- Carrier Restrictions: Some mobile carriers may have restrictions on hotspot usage or require a specific data plan that includes hotspot functionality. Always check with your carrier if you encounter issues.
Turning On Your Android Hotspot: Two Primary Methods
There are generally two main ways to enable the mobile hotspot on your Android device: through the Quick Settings panel and via the main Settings menu.
Method 1: Using the Quick Settings Panel (The Fastest Way)
This is usually the quickest and easiest method.
Step 1: Swipe Down from the Top of Your Screen
To access your Quick Settings, simply swipe down twice from the top of your Android phone’s screen.
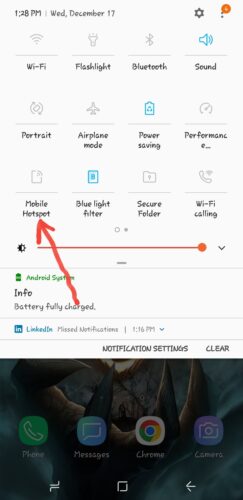
Step 2: Locate and Tap the “Hotspot” or “Mobile Hotspot” Tile
Look for an icon that resembles a Wi-Fi signal with an arrow or a small antenna. It might be labeled “Hotspot” or “Mobile Hotspot.” Tap it to turn it on.
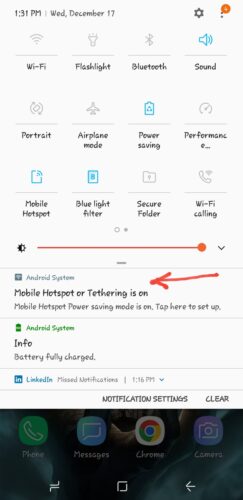
You may see a notification confirming that your hotspot is active.
Step 3: (Optional) Long-Press for More Settings
If you long-press the “Hotspot” tile, it will usually take you directly to the detailed hotspot settings where you can configure the network name, password, and other options.
Method 2: Through the Settings Menu (For More Control)
This method provides access to all the hotspot settings, allowing you to customize your network.
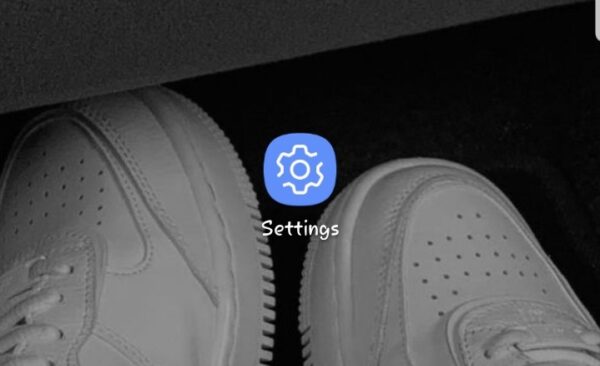
Step 1: Open Your Phone’s Settings
Tap the “Settings” icon on your home screen or in your app drawer. It usually looks like a gear.
Step 2: Navigate to Network & Internet (or similar)
The exact wording may vary slightly depending on your Android version and phone manufacturer (e.g., Samsung, Google Pixel, OnePlus). Look for options like:
- “Network & internet”
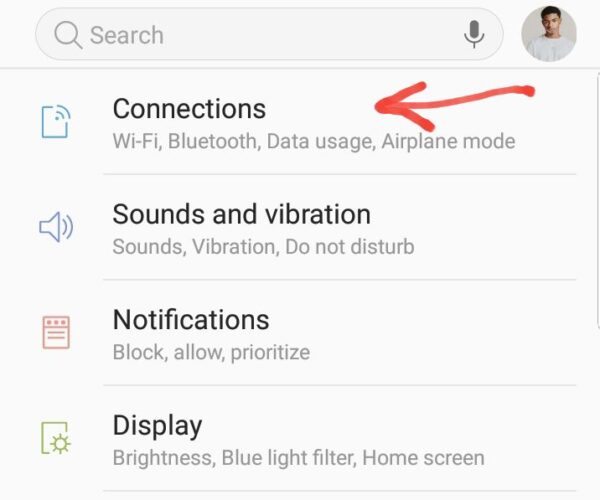
- “Connections” (on Samsung phones)
- “Wireless & networks”
Tap on the relevant option.
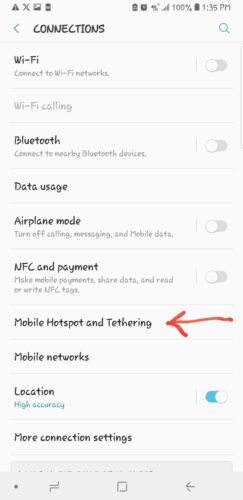
Step 3: Find “Hotspot & tethering”
Within the network settings, you’ll usually find an option called “Hotspot & tethering” or “Mobile Hotspot and Tethering.” Tap on it.
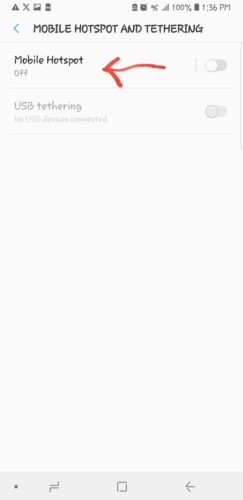
Step 4: Tap “Wi-Fi hotspot”
Inside “Hotspot & tethering,” you’ll likely see “Wi-Fi hotspot.” Tap this option.
Step 5: Configure Your Hotspot Settings
Here, you can customize your hotspot.
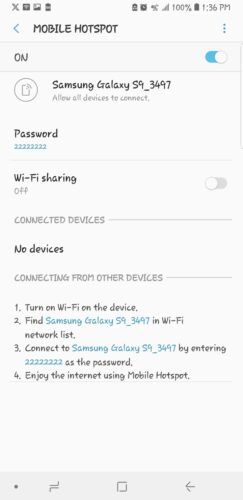
Network name (SSID): This is the name that will appear when other devices scan for Wi-Fi networks. You can change it to something unique and recognizable.
- Security: Always choose WPA2-Personal or WPA3-Personal for the strongest security. Avoid “None” as it leaves your network open and unprotected.
- Hotspot password: This is crucial! Set a strong, unique password to prevent unauthorized access to your data.
- AP Band (2.4 GHz vs. 5 GHz): Some phones offer a choice.
- 2.4 GHz: Offers a wider range but generally slower speeds.
- 5 GHz: Offers faster speeds but a shorter range. Choose based on your needs.
- One-time data limit / Max connected devices: Some phones allow you to set a data limit for the current hotspot session or limit the number of devices that can connect.
Step 6: Toggle On “Wi-Fi hotspot”
Once you’ve configured your settings, toggle the switch at the top to turn your Wi-Fi hotspot “On.”
Other Tethering Options
Beyond Wi-Fi hotspot, Android offers other ways to share your internet connection:
- USB Tethering: Connect your Android phone to a computer with a USB cable. This provides a fast and stable internet connection, and your phone charges while connected. You’ll find this option in the “Hotspot & tethering” menu.
- Bluetooth Tethering: This uses Bluetooth to share your internet connection. It’s slower than Wi-Fi or USB tethering but can be useful for low-bandwidth tasks or when you want to conserve battery on your phone. Also found in “Hotspot & tethering.”
Troubleshooting Tips
- Ensure Data is On: Make sure your mobile data is enabled on your Android phone.
- Check Data Plan: Confirm your carrier supports hotspot usage and that you haven’t exceeded your data limit.
- Restart Hotspot: Try turning the hotspot off and then on again.
- Restart Phone: Sometimes a simple phone restart can resolve connectivity issues.
- Forget and Reconnect: On the client device, “forget” the network and try reconnecting.
- Check AP Band: If you’re having trouble connecting, try switching between 2.4 GHz and 5 GHz if your phone offers this option.
FAQS
Yes. All internet activity on connected devices counts toward your mobile data.
No. Hotspot shares your cellular data connection.
The feature is free, but data usage may be billed depending on your plan.
Yes, if your phone and carrier support 5G hotspot.

Improve this guide


User forum
0 messages