How to Clean up your Rooted Phone with NoBloat
I know that I am not the only one annoyed by those pre-installed apps that are useless most of the time. However, the worst part is that they are not only standing there, but there are also other disadvantages of bloatware. To be more specific, it takes up so much of your storage space, it’s running in the background without your permission, it consumes precious system resources and slows down your Android phone, so don’t just sit there and do nothing!
Sometimes, a third-party app found in the Google Play Store is exactly what you need and I have the perfect suggestion for you. I am talking about an app which is called NoBloat Free and has the amazing ability to remove all those unwanted apps from your device. And if you want even more, then take the paid version of this app for no more than $1.99 (USD) that can also batch operations and even create a blacklist of system apps to delete.
However, the free app still does great job of helping you rid your device of bloat as long as it can be used to disable apps, back up apps, back up and delete apps or even delete apps without taking a backup.
In the end, you’ll get rid of all those useless apps taking up precious space, but to be able to use it, don’t forget that a rooted device is a must. If this is not a problem, then I can assure you that the installation of NoBloat Free is quite simple. Just follow these simple steps:
How to Clean up your Rooted Phone with NoBloat:
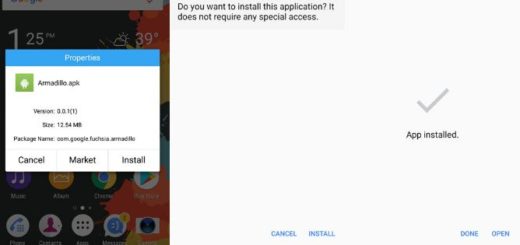
- Enter here and take the NoBloat Free app;
- Install it onto your handset;
- After the installation is completed, you should see a launcher for NoBloat Free on your home screen;
- When you run NoBloat Free, you’ll be prompted (by the tool used for rooting) to grant superuser access;
- Grant superuser permission and you’ll find yourself on the main window of the app;
- Tap System apps;
- Now, you will see a listing of all the apps on your device. There, you can find the app or the apps that you want to remove;
- If you have chosen the free version, you have to remove the apps one at a time;
- Tap the app to delete;
- Select either Backup and delete or Delete without backup;
- Tap Ok to confirm your action;
- You should choose the Backup and delete option in order to be able to go back and restore an app;
- From the NoBloat Free main window, you can always tap Backed up apps, locate the app to be restored and tap on it,then tap Restore and OK to confirm your action and the app should now be restored.