How to Install Camera MX for free on your Android Device and enjoy Live Photos functionality
3 min. read
Published on
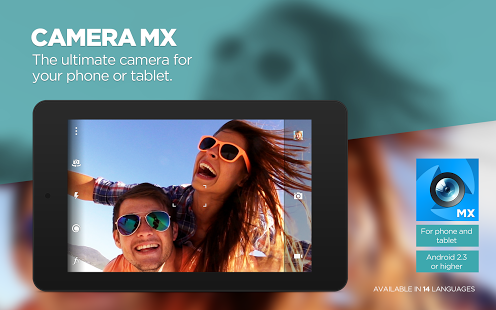
Have you heard of iPhone’s 6s “Live Photos” camera mode? Well, it seems that that captures the few seconds of video that occurred before and after you hit the shutter button, and displays them kind of like a GIF, but who says that you cannot enjoy that on Android as well?
Let me tell you about a special Android app that comes with this “Live Photos” functionality as well.
I am talking about none other than Camera MX that can be used to create and edit photos, as well as videos, so this is your chance to enjoy the special iPhone Live Photos feature even on Android.
I can assure you of the fact that the intuitive user interface makes recording videos and photos quicker and easier, you get extensive photo and video editing, as well as an incredible photo quality.
And the most interesting part is that Camera MX has a shooting mode called “Live Shot” that makes me think of iPhone once again. So, the animated portion of your photo is recorded a few seconds before you tap the shutter button and that’s what you have to do:
How to Install Camera MX for free on your Android Device:
- First of all, you have to take Camera MX from here;
- Install it onto your Android device;
- Put Camera MX into “Live Shot” mode by tapping the spiral-shaped icon on the top or left side of your screen;
- From here, hold your Android phone still for a few seconds and frame up your shot;
- Up next, you must tap the shutter button to capture the scene;
- After a few seconds of processing, your Live Shot will be ready to view;
- At that point, tap the gallery thumbnail in the corner to check it out;
- You’ll now see a still photo which looks like Apple’s Live Photos, the image becomes animated when you press and hold the screen;
- If you’d like to change the beginning or end of your Live Photo-like looping video, tap the edit button at the top of the screen;
- Then, choose “Edit Live Shot”;
- From here, you can use the sliders to choose where your video starts and finishes;
- Even more, numerous effects such as HDR, flip, kaleidoscope, automatic optimization, textures) and optimization options such as brightness adjustment, photo rotation, contrast, saturation) help you create truly unique photos;
- Don’t forget to tap the “Save” button when you’re done;
- Are you proud of what you did? Then, tap the “Share” button at the top of the screen and select “Share Live Shot”;
- From here, you’ll see Android’s share menu, where you can select an app or service to send the file to.



User forum
0 messages