Learn to Archive Photos in Google Photos
2 min. read
Updated on

You take a lot of pictures and they all need to go somewhere, so Google Photos often turns into their home. Google is constantly adding features to Google Photos, so it’s easy to miss something important with so many on your plate. For example, do you know that you can archive images from your main stream? The feature comes in handy if you’re looking to get your pictures more organized within Photos. You’ve promised yourself to be more organized this year, right?
The same goes for those of you who want to move a few images off the main view. Yes, you can basically hide any that you don’t want to see too often. All photos that you archive will still be in any albums that they were added to and folders on your device. And they will be used to create movies or animations.
Also note that archived photos still show up in albums search, but this shouldn’t be a problem. Archiving photos in Google Photos is an easy way to keep your main timeline free of clutter, so let me guide you:
Learn to Archive Photos in Google Photos:
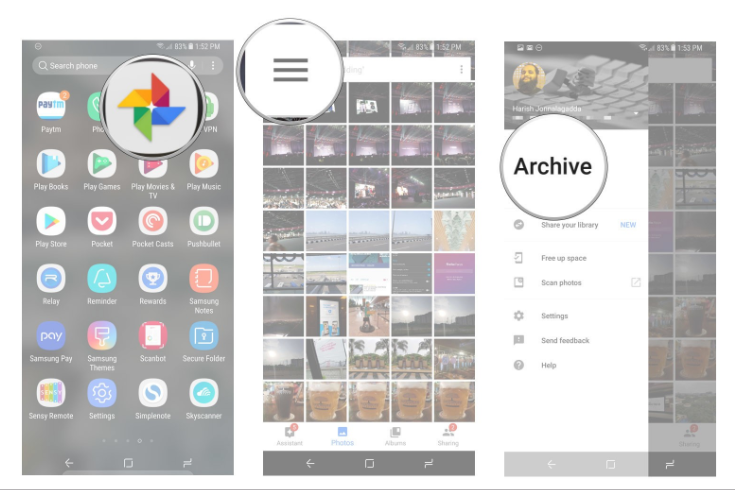
- At first, open Google Photos from the app drawer or home screen;
- Then, log-in to your Google account;
- Next, open the photo you want to archive;
- You can now tap the overflow (the three-dot) menu;
- Tap on Archive;
- Now, in order to see what all is there in your archive section, tap the three-line menu on top-left, and then tap Archive;
- You may also add images to the archive by selecting the Add to archive button. Then, you just need to tap on the images you want to archive and select Done to archive the pictures;
- If you want, you can bring back photos from your archive section to the main view. Do that by selecting the photo, then tapping the overflow menu, and finally tapping the Unarchive option.
Do you see how simple all these actions are? How do you manage your photo library on Google Photos? Let us know in the comments area below.


User forum
0 messages