Learn to Change Icons in the Quick Settings
2 min. read
Updated on

We all love the quick settings feature on our smartphone. There will always be a short list of things we’ll think of changing sooner or later. Therefore, digging into the device settings to do them becomes something that you often do so the “one tap” solution of a quick setting toggle is a lifesaver. Since everyone has different things they desire, it’s perfect that you can set those quick settings up to best fit you.
For example, do you know how simple is to change icons in the Quick Settings? Since Android 6, you can choose which items are displayed in the Quick Settings and how they are sorted. And the procedure of doing that isn’t at all complicated. Even a newbie can do it:
How to Change Icons in the Quick Settings
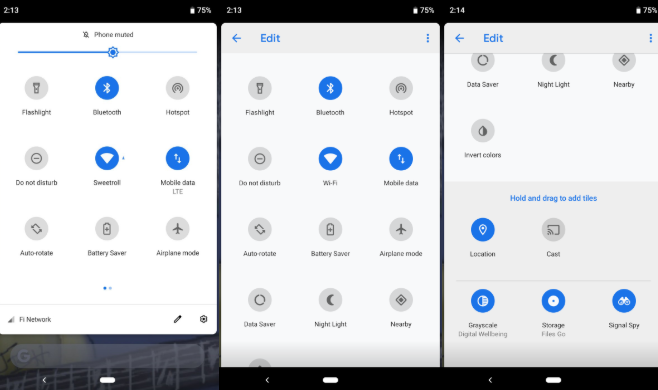
So, if you need a little bit of help, let me guide you. First of all, you need to pull down on the notification shade twice to expand the card. Then, you have to tap the pencil icon in the bottom right to open the quick settings menu.
When you tap the pen, you’ll be able to see new items that may have been hidden before. I find the first few elements as being special as they will appear above your notifications, but you can keep on exploring. Near the bottom, you’ll find quick setting icons that aren’t displayed while you aren’t in editing mode. It is up to you to hold and drag these icons to add them to your quick settings card. And if you want, you can also drag any icon there to remove it from your quick settings card.
At the very bottom of the edit interface, you can find the quick setting icons added by third-party applications. These can be added to your quick settings card the same way built-in icons are.
And I must add one more thing: the Quick Settings customization tool is there to help and even if works reasonably well, it’s still a little rough around the edges. That said, it works well enough that I could see Google making it easier to access. Will it happen or not? Let’s wait and see!


User forum
0 messages