How to Root Android 6.0 Marshmallow on Nexus 9 LTE
Android Marshmallow was recently released and believe it or not, we can already talk about a root method available to all the devices running the new operating system. Well, the root developer Chainfire is back in the center of attention and here you can find an update to his popular SuperSU root method in order to let you root Android 6.0 Marshmallow on Nexus 9 LTE.
Well, just as I always tell you, don’t start such an operation before following some important preparatory steps. First of all, note that this tutorial is applicable only for the listed Nexus device, so make no confusion. If you have any other handset than the Nexus 9 LTE one, your journey stopps here for the moment. Your Nexus device must be running Android 6.0 Marshmallow build MRA58K in order to succeed and don’t forget to back up your data, just to be on the safe side.
Don’t hesitate to uninstall the security programs like antivirus, antimalware or Firewall in your laptop or computer as they usually disrupt such operations and don’t start before enabling the USB Debugging option from the Developer Options menu. It’s true that the Developer Options menu might be hidden which means that you will have to enable it first, so go to Settings> About Device and tap no less than 7 times on the Build Number section. Return to Settings, go to Developer Options, find the USB Debugging and enable it right away.
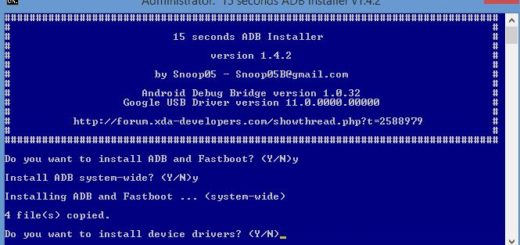
You must also set up ADB and Fastboot on your computer (use this link for that) and ensure that your Nexus 9 tablet has at least 60% battery backup in it. Your device can get bricked if it gets turned off while you try rooting it and I know that this is not what you have in mind.
How to Root Android 6.0 Marshmallow on Nexus 9 LTE:
- For the start, you have to take the custom kernel for your Nexus 9 LTE device from here;
- Up next, take SuperSU v2.50 from here;
- Take the most recent TWRP recovery for your handset from here as well;
- Transfer them to your PC by using the original USB cord;
- Turn off your device;
- Then, boot it into recovery mode;
- It’s time to enter into the main menu of TWRP recovery and choose the Install option;
- Click over the install zip from SD card;
- Browse the SD card for the kernel first;
- Select it;
- You must agree to install that custom kernel;
- Return to the recovery home screen;
- You must choose the install option again;
- Navigate to the SuperSU file in your device’s storage;
- Do not hesitate to select it;
- Confirm the swipe operation at the bottom to install the SuperSU package;
- Go back to the main recovery menu and choose the reboot system option.
Also read this guide on How to Root Android 6.0 Marshmallow on Google Nexus 9 WiFi.