How to Take a Screenshot with Screenshot Assistant
2 min. read
Published on
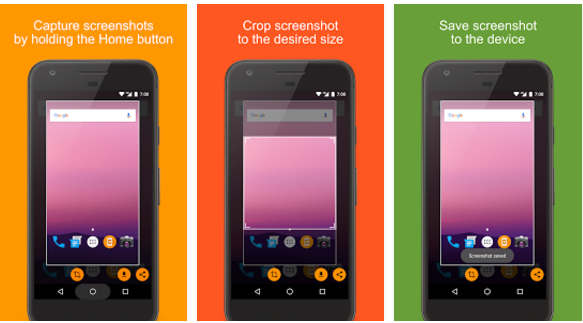
You know that old saying “A picture is worth a 1,00 words” and I couldn’t agree more. I am not here to talk about any tips for your Android smartphone camera, but I am thinking of all those screenshots that we are taking these days. As you know, this is a method of taking a snapshot or picture of whatever is showing on your device screen at the time.
You can capture your entire screen or just a selected portion of it and the screenshot is automatically saved to your handset for a later view or for sharing it with your friends. However, there are situations when it isn’t so easy to take a screenshot with your new device and you could need some help with that.
Therefore, let me tell you more about a special app known as Screenshot Assistant and what it can do for you. As you can imagine from its name, this is supposed to make things easier for you by allowing you to take screenshots by just a tap and hold of the home button on your device.
Yes, you can capture a screenshot by just holding the Home button and you get the same advantages: you can easily crop the screenshot to the desired size, you can save it to the device or simply share the screenshot with your friends.
However, before you begin to take screenshots and enjoy the app, during its initial setup Screenshot Assistant is clear about the fact that you need to change your default Assist app to allow it to use the tap and hold function of the home button on your device. As for configuring it, things couldn’t be any easier either: from the Home screen navigate to Settings, choose Apps, press the Settings icon in the upper right corner, select Assist & voice input and then, press Assist app and select Screenshot Assistant
Screenshot Assistant is waiting for you on Google play, so waste no more time!



User forum
0 messages