How To Root Google Nexus 4
With the Nexus 4, being the frontrunner smartphone used by developers from Android to exceed all expectations when it comes to rooting, the process itself is quite easy to be carried out; it requires the use of fastboot commands, so easy to perform that even beginners can do it. In this tutorial, we will discuss the meaning of rooting, we will provide you with some rooting terms, and we will show you how to root Nexus 4 just by following some simple steps.
What Is Rooting?
Rooting, in general terms, is allowing yourself accessing your own phone. It is just like running programs as an administrator in Windows, or running a simple command in Linux. Having a rooted phone, you will be able to run all the apps that need to gain access to some system settings to your own smartphone.
With tones of different smartphones that use Android, there are more that one single guide for rooting each phone. But, before you start rooting your phone, we would like to provide you with a glossary that involves some useful rooting terms:
- Root: Having root access right on your device, it allows you running apps such as Wireless Tether and SetCPU. Rooting can be done by both installing the Superuser app and by flashing a ROM including root access.
- ROM: It is a type of Android which is modified to an extend that allows it to have extra features such as a different look and speed enhancements.
- Kernel: It is that component of your Android that keeps your software and your hardware both connected to each other. Kernels can be customized and can speed up your smartphone or increase its battery life.
- Radio: It controls the data restored in your phone, GPS, or WI-FI. Custom radios can be found and installed on your phone, but mind that they can sometimes cause problems.
- Flash: Flashing also means installing features on your smartphone such as a Kernel, a ROM, or a software that comes in the shape of a ZIP file.
- Brick: During flashing you can actually brick your smartphone, or also break it. In this situation, it becomes a brick, meaning that your phone is not able to function anymore. You may find people saying “brick”, meaning that “it is on but it doesn`t boot”.
- Recovery: It is a software that allows you to back-up your data, flash a ROM or perform other system tasks. You can also flash a custom recovery such as ClockworkMod, but only after you have unlocked the Bootloader which allows you to have more control over your device.
- ADB: It stands for Android Debug Bridge, and it is a communication line between a computer that communicates with your Android device that is connected to it.
These are only some of the most important rooting terms that can make you better understand how the rooting process works and how can different components of your phones make this rooting properly function. Being all said that, it is time to see how we can root the Nexus 4, using the basis steps above.
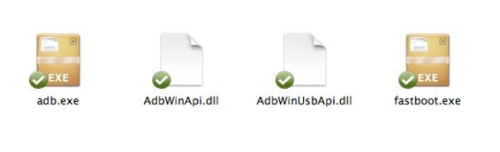
- Just access your ADB/Fastboot files if your Android SDK is already installed on your PC. If not, just install the Fastboot drivers and extract its contents into a new folder called Drivers on your desktop.
Root Google Nexus 4
- Once installed, extract the ADB/Fastboot zip files inside a folder called “android” on your computer. Transfer the TWRP images inside the folder and name it “twrp”.
- If you are using Windows as an operating system, open a new command window by just typing “cmd”, in your start menu or hit the “RUN’ button. If you are using a Mac, open up Terminal. Then browse to the Android folder on your desktop.By default, the “your username” folder will open on Windows, and enter “cd desktop”, followed by “cd android” in the Command prompt. Follow the same steps with your Mac operating system.
- Now, just make sure you switch off your Nexus 4, restart it using fastboot mode just by pressing the Volume Up + Volume Down + Power. All buttons must be pressed simultaneously. After your phone will boot into Fastboot, then connect it to your computer. Since this is the first time your Nexus 4 is connected in Fastboot, it will search for drivers.
- After the drivers are properly installed and both your Nexus 4 and your PC are connected, just enter “fastboot” devices in the command prompt. It will be both easy to do that on Windows as well as on Mac, since the fastboot commands are all the same. The fastboot devices will look like this, if successfully connected:

Root Google Nexus 4
- With the initial set up being done, now you need to enter some fastboot commands to be able to unlock the bootloader from your Nexus 4, in order to gain access to it.
- First, unlock the bootloader by entering the “fastboot oem unlock” command. Accept the warning sign from your Nexus 4, letting you know that you are trying to unlock the bootloader.
Once you run the initial set up, your Nexus 4 will restart. Connect it again to your PC and transfer the SuperSU flashable zip downloaded in step 1 to your internal memory. Then, switch your Nexus 4 and put it on fastboot mode again.
Conclusions
We have seen in this tutorial some basic definitions of rooting and we have tried to summarize some terminologies involving the use of “rooting”. With these in our mind, we have also tried to show you how you can root your Nexus 4, following some simple steps. It is so easy rooting your Nexus 4, that even a novice user can do it!