Automatically Clear Android App Cache when it’s Time
2 min. read
Published on

Let me remind you that when an app is installed on your Android device and is used for some time, it basically stores a lot of data in its cache memory. Due to this aspect, the cache memory grows to that level where it starts affecting the performance of the app and even more than that, the entire Android device can be affected in ways you couldn’t even imagine.
For keeping the efficiency of the installed apps and of your Android phone too, there is a major recommendation: don’t hesitate to clear the cache and temporary data from the apps memory. Is the manual procedure too complicated for you or you simply tend to forget things? I am not here to learn you how to add reminders – I assume that we are way behind that, but I have a much better suggestion for you.
Are you looking for a way to automatically clear Android App Cache when it’s time? Well, you should take in consideration XDA dev Dhi‘s new Xposed module which can automatically clear cache when your apps need a refresh. This will save your internal storage space with no time-consuming methods, so waste no more time.
For the procedure to work:
- Your device needs the Xposed Framework;
- Your device must be rooted or else you are wasting your time. If this is something new for you, then don’t hesitate to read some of our rooting guides;
- You must also verify that Unknown sources is enabled in Settings > Security.
How to Automatically Clear Android App Cache when it’s Time:
- First of all, go to the Xposed Installer app;
- Next, you must find the Download section;
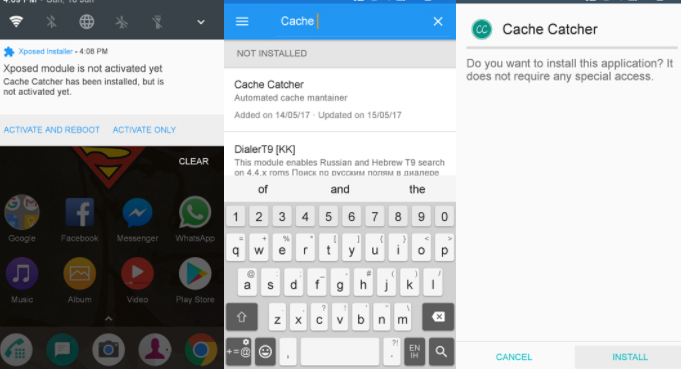
- Search for Cache Catcher and don’t hesitate to install it;
- When the previous step is completed, you have to go to the Modules section and enable the newly added module;
- At the end, don’t forget to reboot your device in order to keep the changes;
- You should usually get a notification as soon as you install the module. You can simply tap Activate and Reboot on this notification instead of manually enabling and rebooting. As you can see, you must set up your own settings and let it work by its own.


User forum
0 messages