Install Official Android Oreo on Galaxy S7 Edge (Exynos)
Just a few days ago Samsung released Android Oreo for its Galaxy S7 Edge devices. The much-awaited update was rolled out according to CSC (Country Specific Code). This update has been rolled out to BTU CSC which means it will only be available for the United Kingdom unlocked version, as well as United Kingdom (Vodafone) and Ireland (Vodafone) for the time being.
The update in cause come with a bunch of new features that you probably dream of for quite a long time. Some of them include: Picture-in-picture mode, Notification channels, Background app optimizations, Notification snoozing, Samsung Bixby, App pair feature and more, along with Samsung specific changes which come as a part of Samsung Experience 9.0 such as GIF support, Samsung Bixby or the new keyboard with stickers that users couldn’t stop talking about.
Don’t you like the sound of all these? Then, get ready. Your Galaxy S7 Edge (SM-G935F) deserves the very best:
- Download the latest ODIN tool via the provided link;
- Download and Install Samsung USB drivers on your PC;
- Perform a complete backup of your personal data, including the storage if you want to keep using it;
- Charge the smartphone.
This procedure of Android Oreo update should go totally smooth, so let’s proceed:
How to Install Official Android Oreo on your Galaxy S7 Edge (Exynos):
- Take the Oreo firmware for your phone:
United Kingdom – unlocked version
United Kingdom – Vodafone
Ireland – Vodafone - Then, it’s time to extract the downloaded ZIP on the PC;
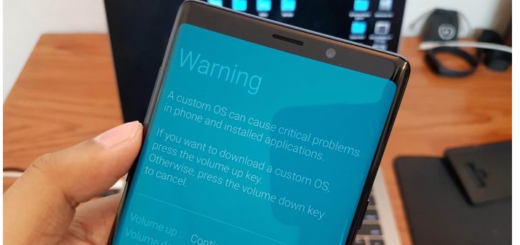
- You can now reboot your S7 Edge to bootloader, therefore power off the phone completely, hold the Volume Down + Bixby + Power button for about 3-5 seconds, then tap the Volume Up key to enter Download Mode;
- Connect the phone to the PC using the USB cable;
- Open the extracted ODIN folder and double-click on ‘Odin3.exe‘ file;
- The ID:COM port will now light up and you have to click on the BL button;
- Then, navigate to the extracted firmware folder. Here, select the firmware file with a name that starts with BL_;
- Similarly, click on the AP, CP and CSC buttons and select the files with initials AP, CP, and CSC respectively;
- Be careful about the fact that you must choose the ‘HOME_CSC’ file and not the regular CSC file. Using the regular CSC file will wipe your phone completely, so make no confusions;
- Also make sure that only Auto Reboot and F.Reset Time are the only checked options;
- Once everything is selected, hit the Start button to install Android Oreo on your Galaxy S7 Edge handset;
- When finished, you shall see the ‘PASS!’ message and the device will reboot automatically. Feel free to disconnect the phone and close the Odin window.
Congrats! Now, you have Android Oreo running on your smartphone. Do let me and the other readers know in the comments what you think about this new update.