Efficiently Move Android Apps to an SD Card
3 min. read
Published on

There are still plenty of Android phones that come with a 4 or 8GB of storage, and you know that such a number isn’t really enough for lots of apps, high-resolution photos and videos, plus a music library. If you also own such a handset with a small amount of storage, you probably keep uninstalling apps to make room for other ones, deleting photos and files and this becomes annoying in time.
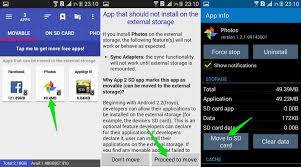
Be sure of the fact that there is a way to expand the storage of an Android device if it has an SD card slot. Well, most of Android phones have a memory card slot, into which you can slot an inexpensive microSD card. If you have an SD card, do not hesitate to easily set it as the default install location for some apps, therefore freeing up space for more apps than you would have otherwise been able to install.
Even more, you can also move almost any currently installed app to the SD card. Before taking any step, don’t hesitate to check what capacity your phone will support. Flagship phones tend to accommodate 128GB or higher, but many cheap Android models accept only 32GB. To be fair, 32GB will be enough for most people.
Note: not all apps can be moved to microSD, and some phones won’t let you move apps to SD at all. This means phones with just 4- or 8GB of internal storage can still run into problems even with a microSD card if you download and use a lot of apps.
Efficiently Move Android Apps to an SD Card:
- Enter into Settings;
- Tap Storage;
- Select your SD card;
- You have to tap the overflow menu button in the upper-right corner;
- Select Storage Settings;
- Then, tap Format as Internal;
- Now, tap Erase & Format;
- Be careful about the fact that if the system determines that your microSD card is too slow it will prompt you with a warning here that it will degrade performance;
- Tap Move now. After making the selection you will tap next and initiate the transfer to your microSD card. The system will indicate how long the transfer will take and how much data will be moved to your SD card;
- At the end, don’t hesitate to tap Done.
At this point, your SD card will now be listed immediately below the internal shared storage and the system will use it as additional internal storage in the future.


User forum
1 messages