
Use Alfred to Turn your Android Phone into an IP Cam
![]() 3 min. read
3 min. read
![]() Published on
Published on
Share this article

Improve this guide
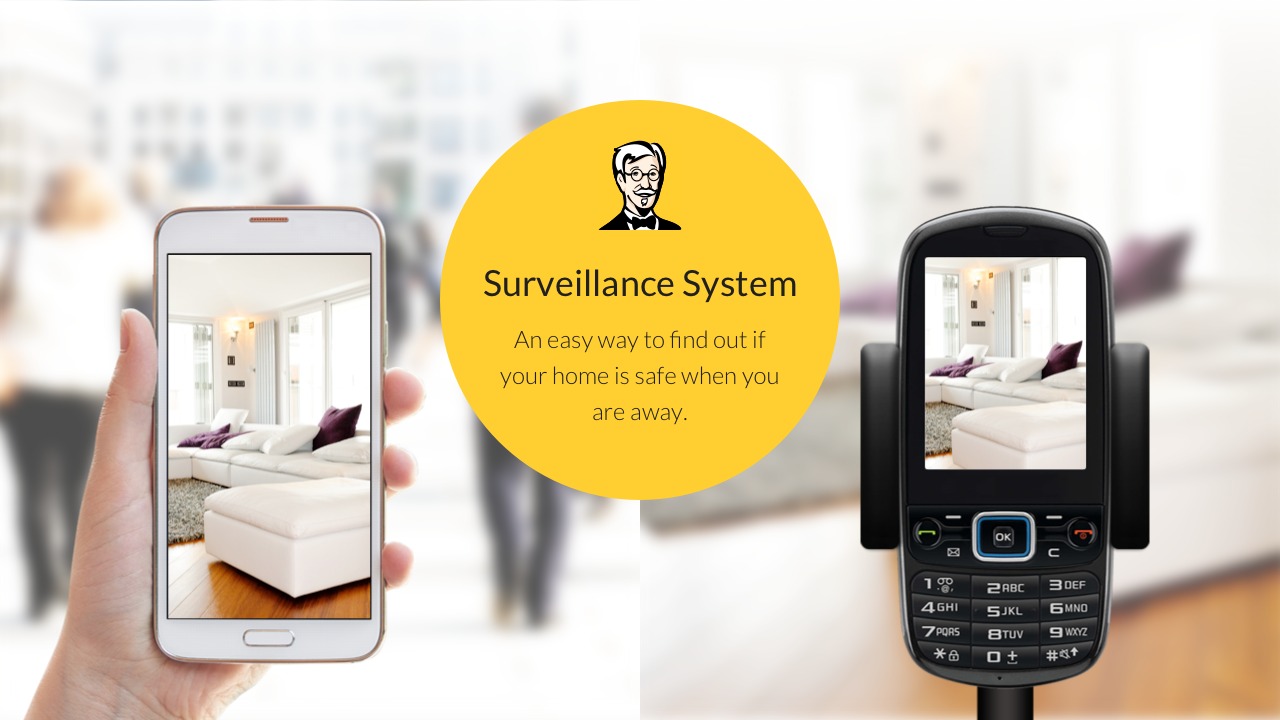
Are you also looking for a reliable home security solution? Then, I am sure of the fact that you’ve made some diggings and this guide is not your first stop, so you are already aware of the fact that home security cameras, surveillance cameras, baby monitors, pet cams and so are more expensive than you have first imagined.
Is there a solution? I know that you want an IP Cam, but you are not willing to spend hundred bucks for it and I actually encourage you to stick to your decision. The Alfred app is an alternative that you will simply adore.
This Android app that I am telling you about is completely free, although it is ad-supported, but this shouldn’t be a problem. You must only have an old Android phone you no longer use to turn it into a security camera and both devices need active internet connection. You get everything what you want as long as most things can be controlled remotely from the viewer device and you can even have the chance to manage a two-way conversation through the camera device, so feel free to also use it as a baby monitor.
And that’s not all! Keep on reading to find out more about what this app has to offer and how can you enjoy its most important functions and features:
How to Use Alfred to Turn your Android Phone into an IP Cam:
- Enter here and take the Alfred app;
- Install it onto two of your Android phones;
- Select one to be a viewer and other a camera;
- Then, you must tap on ‘Next’;
- Do not hesitate to choose your Google account and remember something very important: you must use the very same account on both devices;
- Now, it’s time to place your camera device to watch an area. Be sure of the fact that the camera still works when the device is asleep;
- Verify that the audio is turned on;
- The IP cam is ready, so don’t hesitate to open Alfred app on viewer device;
- Up next, you must double tap the view to see the live video from your camera device;
- On the viewer device, you can also enable Night vision option and set it automatic in the camera settings;
- Don’t forget to also turn on Motion detection. You can activate it on the camera/viewer and select one of the three sensitivity settings. When motion is detected, it takes photos and sends notifications to the viewer device;
- Events and photos are stored for no less than 7 or 14 days, as you desire and choose;
- If you want, you can also choose to add more cameras. Tap the cog icon for a camera in the main menu to rename it;
- What’s even more interesting, you can choose to set up a ‘trust circle’, to share the camera’s feed with another Google address.

User forum
0 messages