
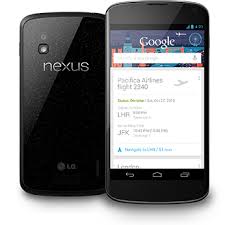
How to Root, Unlock Bootloader and Install CWM Recovery on Google Nexus 4
With Google recently releasing Jelly Bean 4.3 update for Nexus 4, Nexus 7 and Nexus 10, all of you Nexus addicts around the world would want to update your devices manually at a certain point, and to do that, you will have to carefully read this article and follow every single step. We will try to be as direct as possible and tell you everything about how to unblock the bootloader, install CWM Recovery, back up your data and also how to root your Google Nexus 4.
We will first lead you on how to unblock the bootloader and then we will show you a step-by-step guide that can be used for installing CWM Recovery on Google Nexus 4 via a fastboot method. Do not forget that this installation is easy to carry out even if you are a novice or a senior to Android and we will try to be as brief as possible when proceeding to the instructions.
First, we would like to familiarize you with some terms concerning the process of rooting, and thus, to better understand the process of installing CWM Recovery on your wonderful Nexus 4.
- Rooting your LG Google Nexus 4: It is an easy process through each you will benefit the privileges of having a powerful Android subsystem to install other great patches such as custom ROMs Kernels, or others. Rooting can be achieved by both manually (you will need some fastboot) and automatically (you will need to use some toolkits and software). Since a manual process can be more accurate and more precise, we will guide on using this method by using fastboot.
- Unlock the Bootloader of your Google Nexus 4: A bootloader is nothing but a boot locked by your phone manufacturer to make sure it avoids interfering with your OS. We have to unlock this bootloader to be able to change the sequence of the boot and to modify the OS, if we want to successfully install CWM Recovery.
- ClockWorkMod or CWM suitable with your Google Nexus 4: It is actually what we are interested in. The Custom Recovery, put it in simple terms, it is your device`s stock recovery that comes with some important features. It is an important tool, since it installs Customs to your firmware (the flash memory of your device).
Since we have explained you the general terms followed by some instructions, we will now proceed to the next level of our article and we will provide you with some prerequisites and tell you how to unlock the bootloader. Then, we will show how to install ClockWorkMod on the LG Google Nexus 4.
How to tweak your Google Nexus 4
Prerequisites:
- An USB data cable which must be compatible to enhance a good connection between the PC and your device.
- Some USB drivers.
- The level of your battery must be at least 60% to successfully carry out the process of installing the CWM.
- You MUST back-up your device data; unlocking the bootloader will erase your all your information from the device.
- Proceed with downloading the required files: the files which are being requaired are found on this page. This guide is based on the xda-developers procedure, so we have to thanks them for the same.
- After downloading, just extract the zip files to your desktop; now you have your “fastboot” folder that contains all the files needed to complete the process.
Unlocking the Bootloader
- Switch off your smartphone and then reboot it into the bootloader mode by only pressing Volume Down + Power Buttons in the same time.
- Use the USB data cable to connect the device to your PC.
- Open your fastbook folder from your desktop, containing the zip files and press the shift button and then right click on a space which is empty in the folder, and select “open command prompt here”.
- Next, there will be a command prompt popping up.
- It is a command type like this one shown below: “fastboot flash recovery CWM.img”.
- Use the volume keys to highlight “YES” and select it just by using the Power button.
- Now your device will reboot and will reset itself. Your bootloader from your Nexus 4 is successfully unlocked.
Installing ClockWorkMod (CWM)
- Switch off your smartphone and then reboot it into the bootloader mode by only pressing Volume Down + Power Buttons in the same time.
- Use the USB data cable to connect the device to your PC.
- Open your fastboot folder from your desktop, containing the zip files and press the shift button and then right click on a space which is empty in the folder, and select “open command prompt here”.
- Next, there will be a command prompt popping up.
- It is a command type like this one shown below: “fastboot flash recovery CWM.img”.
- This way, your ClockWorkMod Recovery image file will be flashed to your device.
- Boot up to Recovery just by selecting “Recovery” and press the Power button.
- Now, your ClockWOrkMod is on your Nexus 4.
Backing-up Using ClockWorkMod
- Switch your device off, press Volume Down + Down and the Power Button at the same time until the boot selection mode pops up. Select Recovery with the help of the volume buttons and the power button to select.
- Go to “Backup and Restore” and Backup your ROM.
- Do not exit the Recovery.
Rooting Your Nexus 4
- Without exiting the Recovery, just download the SU binary flash zip for your device – from here.
- Connect your phone to your PC.
- In the recovery mode, go to “mounts and storage” and mount the USB storage. The storage of your device will be mounted to your PC.
- Copy/paste the downloaded CWM-SuperSU-v0.93.zip to the storage of your device.
- Unmount the USB storage.
- Disconnect the USB cable.
- Go to the folder “Install zip from sdcard”>”Choose zip from scard”>Select the CWM-SuperSU-v0.93.zip and flash it.
- After that, select “reboot system now”.
Congratulations, now you have successfully root your Nexus after you have installed ClockWorkMod Recovery on your Android based LG Google Nexus 4. Your device is now perfect and ready for flashing any Custom ROM.


hi!
i was updating my nexus 4 and its battery died.
While upgrading to Android 4.3 OS update, the phone updated but then the battery died while restarting and updating the OS part.
Now, the phones not starting up. When i charge it, only a red light blinks and then goes off.
when i connect it to my laptop, a small DING Sound comes on and then the red light blinks and goes off.