
Fix Ext4 Image Error in Odin
![]() 3 min. read
3 min. read
![]() Updated on
Updated on
Share this article

Improve this guide
If you are the owner of a Samsung Galaxy device, then you are no stranger when it comes to using Odin. This is an essential tool if you have to install a stock firmware, to flash a custom recovery on your phone or tablet and not only, but as you know, you won’t always receive the PASS! message on Odin.
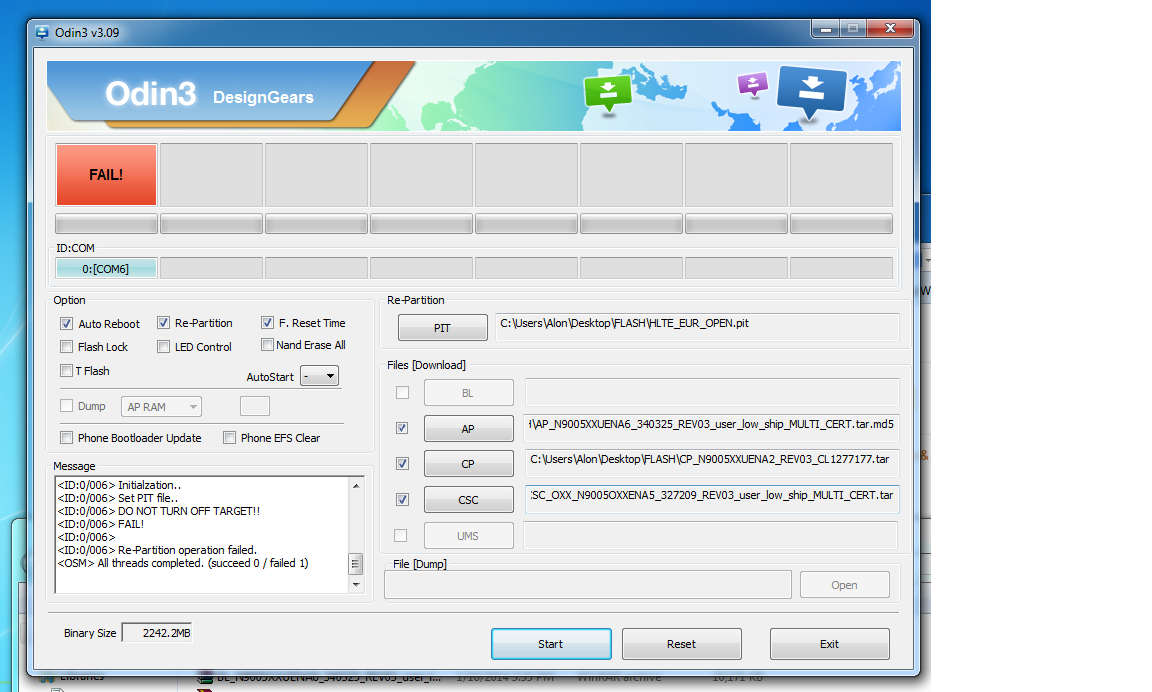
We bet that you are here exactly due to that annoying red signal with the FAIL! message on top of it or due to the “invalid ext4 image” error that you might encounter while flashing the stock firmware on your Samsung Galaxy device. In case of not already knowing, this is an error that can be found while attempting to flash a firmware using Odin with a downgraded (and sometimes upgraded) bootloader to the one installed on a Samsung handset.
This file format for Linux aims at extending storage limits and adding some performance improvements to devices that use Linux kernel. There is no mystery that Android is based on Linux too, so it uses EXT4 storage infrastructure. Do you want to find a solution to this problem? We actually have two methods, so don’t hesitate to continue reading:
How to Fix Ext4 Image Error in Odin (method 1):
By taking in consideration the fact that the “invalid ext4 image” error is directly related to the storage partitions on your device, then the most obvious solution to this problem comes from repartitioning the internal storage.
All you need to do is to get the PIT file for your device (Make sure that the PIT file you use is for the same model number and storage capacity as yours) and the error will be gone.
How to Fix Ext4 Image Error in Odin (method 2):
- After ending up with the error message, what you have to do is to take off the battery and put it back in;
- Press the Volume down, Home and Power buttons at the same time to boot into Download mode;
- Start the Odin program on your computer;
- Establish the connection with your handset;
- It’s time to download the CWM Recovery package for your specific model;
- In the PDA field, select the CWM Recovery .tar.md5 file;
- Click on Start;
- Start holding the Volume up + Home buttons together and you should end up in CWM Recovery;
- Just choose reboot system now.
- You will receive the message that some package is missing and that it wants to install it. You must choose Yes;
- Next, it may ask for root, so choose Yes once more;
- Your handset should reboot and your firmware should be working properly.
If you got encounter any sort of problems using this tutorial, please leave us a comment in the box from below and be sure that we’ll get to you as soon as possible.


User forum
0 messages