
How to Adjust Exposure on Galaxy S7
![]() 3 min. read
3 min. read
![]() Published on
Published on
Share this article

Improve this guide
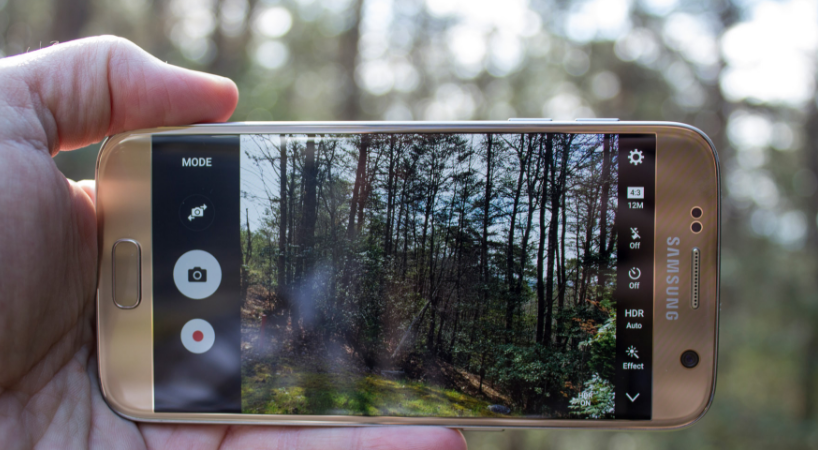
Galaxy S7 is equipped with a 12-megapixel camera that you must love. Although this camera has fewer megapixels than last year’s S6, the truth is that the number is less important as long as it takes much better photos. Scenes are brighter, which makes the action easier to see, the colors are truly vibrant, and detail is excellent in photos taken with the Galaxy S7’s 12MP primary camera.
Even more, the fast autofocus found on the handset’s dual pixel camera often makes sure you don’t have to focus manually. However, tapping the display in the camera app brings up one other feature that is very useful: the exposure slider. Once you’ve tapped the screen, you don’t actually have to slide your finger on the slider, but it is much easier as you just have to swipe up or down anywhere on the screen and this will adjust the exposure of the picture.
You can also put your fingertip anywhere on the screen in the camera app, and keep it there for no more than a few seconds in order to lock exposure to that particular part of the scene. This is a simple way to manually override your phone’s automatic exposure settings, without having to dive into the complex Pro camera mode that you might be afraid of. Yes, I know that Samsung’s smartphones sport some of the best cameras in the industry, and the Galaxy S7 can capture amazing photos even in auto mode. However, the Pro mode is a must-have, so you should get over your fears and there is absolutely no need to be intimidated by the Galaxy S7′s existing camera modes or to install additional camera modes.
And remember that you can adjust Exposure every time you want to make sure an important part of your photo is exposed correctly, when the automatic exposure settings don’t bring it out the way you like and when you want more from your device’s camera.
Keep on reading more about the handset’s camera:
- Do you know that you can Take Galaxy S7 Camera Photos using your Voice?;
- Learn How to Quickly Launch the Galaxy S7 Camera Application by using the steps from this guide;
- Learn More about Galaxy S7 Front Camera options, not to mention that the company also released the following 6 additional Galaxy S7 camera modes that you can enjoy for free;
- Here you can find all about the Touch Screen Gestures from the Galaxy S7 Camera Preview Screen;
- Even if you have a high-end device, errors are not out of the question, so see what you must do in order to Solve Galaxy S7 “Warning, Camera failed” Error.


User forum
0 messages