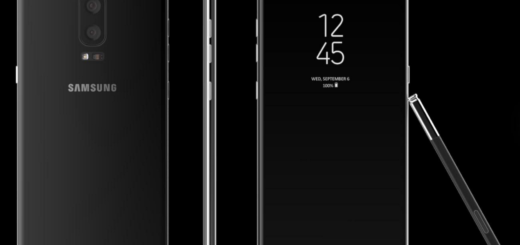
How to Root your Galaxy S8 (Exynos)
Rooting your device always gives you a lot of features which you can never dream of with Stock ROM. How could you not want this for your Galaxy S8? If you are a Galaxy S8 user, then you can install TWRP Recovery on your handset and also rooted it. Thanks to developer jesec, who provided the unofficial TWRP for Samsung Galaxy S8, I have shared with you this guide on how to install TWRP Recovery on Samsung Galaxy S8 and now you are ready to take things to the next level.
With a rooted Galaxy S8, you are free to install custom ROM and custom kernel on your device for faster and better performance, you can increase battery life, block ads with the help of ad blocker, kill background process automatically, privacy settings can be changed and so much more.
However, when it comes to rooting your device, this method will work on the Exynos variants of the Samsung Galaxy S8 since developers over at TeamWin have released the first TWRP build only for these versions. Therefore, only Samsung Galaxy S8 (dreamlte) SM-G950F, SM-G950FD, SM-G950L and SM-G950N owners can apply the below steps for below.
AndroidFlagship will not be held responsible for any kind of damage occurred to your Galaxy S8, while following this tutorial. Do it at your own risk. And such a procedure is quite risky even if you have the latest TWRP installed, a backup and the smartphone completely charge, so newbies are advised to stay away.
How to Root your Galaxy S8 (Exynos):
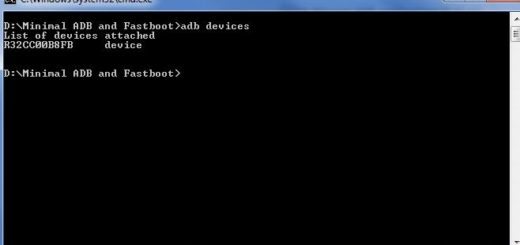
- You must first grab Magisk-v12.0.zip;
- Then, boot your device into the recovery mode by pressing and holding the Bixby and Volume up buttons, then pressing the Power button;
- Once phone turns on, let go of the Power, while still keeping Bixby and Volume up buttons pressed;
- Tap the Install button in TWRP, navigate to the location where you copied the the no-verity-opt-encrypt-5.1.zip;
- It’s time to select it;
- Swipe the installation confirmation slider when prompted;
- If you see the red text error in TWRP saying unable to mount storage, go to the main menu in TWRP and select Wipe> Format Data. After that, reboot the recovery and then install no-verity-opt-encrypt.zip;
- Return to the main menu in TWRP and select Reboot> Recovery;
- When the device reboots into TWRP, tap the Install option, navigate to the Magisk-v12.0.zip and install it;
- Magisk will now be installed on your device and it will be rooted the next time you boot it up;
- When the flashing is complete, tap Reboot> system.
That’s it! Now, your Samsung Galaxy S8 is rooted! If you have any questions, then comment below.