Rooting Procedures for Motorola Moto G (Tutorials Included)
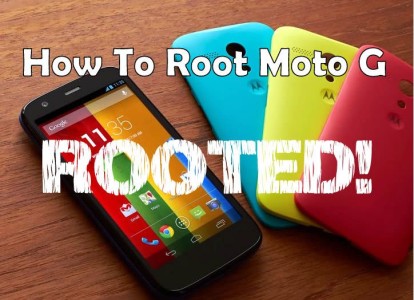
We have already told you several times that rooting your device will let you enjoy its true potential and Motorola Moto G is no exception. We can only remind you that the rooting procedure will allow you to run a variety of exclusive apps such as Titanium Backup or Root Explorer, to try Xposed Framework and much more; we also want to tell you that this operation can be applied by anyone who is interested, but don’t understand that we are encouraging you to root your handset. You are the only person hold responsible for anything that might happen during this procedure, so you should continue only if you are sure that you know what you are doing. And we give you the possibility to choose from two different rooting methods, using the Modified Recovery package or the One Click Superboot Root one.
Review the risks:
- First of all, you need to unlock the bootloader of your Moto G; if you don’t know the procedure, we can help you with a simple tutorial that won’t take more than a minute to be applied;
- There are certain carrier restrictions which can interfere with the rooting process; in case of unsuccessfully trying to root your smartphone, you must install the UK Generic Firmware/stock ROM for your Moto G which will remove all the current carrier restrictions. Then, try again to root it and things are supposed to work normally;
- Remember that this tutorial is not compatible with all the models of Moto G. The model number of your Moto G must be XT1033/XT1032 or you’ll fail rooting it or even worse, you’ll end up bricking it. But it doesn’t matter if you use Windows, Linux or Mac; we have detailed steps for any of these versions;
- We are not responsible of any damages that might occur to your Motorola Moto G and its components; even more, this procedure might void the warranty of your smartphone.

Rooting Procedures for Motorola Moto G
In order to avoid any unpleasant surprises, don’t leave aside the following list of preparatory steps and follow the rooting procedure exactly as presented, without skipping any step.
Preparatory steps:
- In order to apply the rooting procedure with any of the following methods, you’ll need to use a computer or a notebook; on both your computer and Motorola Moto G you’ll have to temporarily uninstall the security protection which can interrupt the flashing process;
- Do you have the proper drivers installed on your computer? Take care of this aspect before starting and risking damaging your handset;
- Back up all of your important data by using the appropriate applications from Google Play or any other method that suits you the best;
- Avoid any potential complication and check if you Motorola Moto G is at least 50% charged.
How to Root your Motorola Moto G with One Click Superboot Root Method:
- Download the SUPERBOOT ROOT FILE from here and install it on your computer;
- Start by enabling developer options by going into Settings, selecting About phone and taping on “Build number” seven times; then enable the USB debugging option;
- Connect the device to your computer or notebook;
- Power it off and enter the Fastboot/Bootloader Mode;
- Extract all the files in a new folder and if you are a Windows user, then execute ‘flash-windows.bat’ in the new folder and your Motorola Moto G will automatically rebut full root access;
- If you are a Linux user, then you must open Terminal window by pressing Alt + Ctrl + T and then type ‘cd’. After placing the folder in the terminal window press Enter, type ‘chmod +x superboot-linux.s’ and ‘sudo ./superboot-linux.sh’;
- If you are a Mac user, type ‘cd Path-to-the-folder-extracted-above’ on Terminal window and press Enter. Type ‘chmod +x flash-mac.sh’ and then ‘sudo ./flash-mac.sh’ to initiate the rooting operation;
- Your Moto G handset will automatically reboot so that, at the end, it will be rooted.
In case of this One Click Superboot Root Method did not work (or if you think that it is too complicated), you can also download the MODIFIED RECOVERY ROOT FILE from here and choose the second rooting option:
How to Root Motorola Moto G using Modified Recovery Method:
- Just as previously mentioned, you have to enable developer options, as well as the USB debugging option and then connect your Moto G to the computer, power it off and enter the Fastboot/Bootloader Mode;
- Extract the root file in a new folder;
- If you use Windows, you need to hold Shift Key and Right click on an empty space in the folder that you have just extracted and click on the Open Command Window option. Type ‘fastboot-moto-windows flash recovery recovery.testkeys.img’ in the command window and then go to the Recovery option and select it by using the Volume Up Key. Finally, select ‘Apply update from SD’ by using the Power Key and type ‘adb-windows sideload supersu.motog.zip’ in the command window;
- If you use Linux then all you have to do is typing ‘cd ’ on Terminal window and pressing Enter. Then, type ‘chmod +x ./fastboot-moto-linux && chmod +x ./adb-linux’ in the terminal winodow, followed by ‘./fastboot-moto-linux flash recovery recovery.testkeys.img’ to flash the modified recovery. While your Motorola Moto G is still in fastboot mode, you must select the Recovery option and then navigate and select to Apply update from SD; Type ’./adb-linux sideload supersu.motog.zip’ in the terminal;
- If you use Mac on your computer, start by opening a Terminal window and typing ‘cd Path-to-the-folder-extracted-above’. After typing the following in the terminal: ‘chmod +x ./fastboot-moto-mac&& chmod +x ./adb-mac’, then type ‘./fastboot-moto-mac flash recovery recovery.testkeys.img’. Use the Volume Down Key to navigate to the Recovery option and select it; then use the Volume Keys to go to Apply update from SD in the recovery screen and select it. Type the following in the command window: ‘adb-windows sideload supersu.motog.zip’ and the rooting process should be over after your phone will reboot.
Therefore, the tutorial has been successfully completed. After seeing both these rotting methods, there are big chances to agree with us that the Modified Recovery Method seems a bit more complicated, but this shouldn’t stop you to succeed finishing the rooting operation. And if you need our help, don’t hesitate to contact us.


