Install CM11 on Sprint Galaxy Note 3 (Android 4.4.2 Firmware)
For all those dreaming to enjoy the latest Android 4.4.2 on their Sprint Galaxy Note 3 device, we must tell you that the official update is expected only around next month or even March. But if you don’t have any more patience, there is another way to enjoy this latest and customized Android 4.4.2 KitKat by installing CM11 on your device. Like that, you’ll have the chance to enjoy some of the most impressive Android 4.4.2 KitKat features such as 14% less memory usage, Screen Recording, Tap to Pay, cloud printing from Gallery, Google Home as the new Launcher, Core System Processes Trimmed, more efficient apps, Full-screen Immersive mode, a redesigned Quickoffice, seamless change in resolution during media playback and much more.
So, here we are to learn you how to flash this Android 4.4.2 Firmware, but not before reviewing the risks and following the preparatory steps:
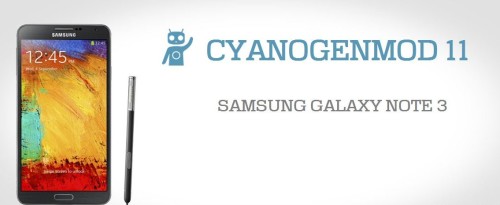
Install CM11 on Sprint Galaxy Note 3
Review the risks:
- We want to warn you that installing this CM 11 Android 4.4 KitKat ROM on your Sprint Samsung Galaxy Note 3 means voiding its warranty; even more, we want to be clear about the fact that we are not responsible for any damage caused to your Sprint Galaxy Note 3;
- This (CM11) is just an Android 4.4.2 Firmware and not the official release, so you should expect some bugs in it. For example, some Bluetooth Calling issues have already been reported, but they are expected to be soon fixed by the developers;
- You have to be sure about its SM-N900P model number. For that, you can go in the ‘About device’ option under Settings or you can simply check it on the packaging box of your handset. You have to be aware of the fact that this tutorial is only for Sprint Galaxy Note 3 SM-N900P and not any other version from AT&T, Verizon, T-Mobile and so on.
If you are not sure that you can follow this procedure, it is better to wait for the official release or you risk bricking your smartphone.
Preparatory steps:
- We want to warn you about the fact that a full factory wipe and wipe /system is included, so you should backup your device data. For example, if you’ll later need your SMS & Contacts, you can use the Super Backup app (download it from here); for your SMS and Call Log you can use the SMS & Call Log Backup app (here available) or you can simply use the G Cloud Backup (download it from here) which is able to backup all your our SMS, Contacts, Call Logs, Photos , Music, Videos , Documents, Browser Data or System Settings, but after paying $5.29;
- Enable the USB Debugging Mode by going “Settings > Applications > Development > USB debugging;
- If you want to install CM11 on Sprint Samsung Galaxy Note 3 you are going to need a notebook or a computer;
- Make sure that you already have the USB Driver for Sprint Galaxy Note 3 installed in your PC;
- Disable the security protection from your computer and find for the original USB cable that has to be used for connecting the computer with your smartphone;
- Make sure your Galaxy Note 3 has at least 60% battery power;
- Do you have the latest CWM or the TWRP recovery installed on your handset? If not, that’s the perfect moment to do so or the procedure won’t work properly.
Download both the GAPPS FILE from here and the ROM FILE from here to your notebook and then connect it to your Samsung Galaxy Note 3 from Sprint for moving these files to your phone’s root storage.
If you done everything that we have mentioned above then you are ready to follow this step-by-step guide; It is very important not to extract any files.
How to install CM11 on Sprint Galaxy Note 3 (for both CWM and TWRP users):
- Disconnect the USB cable and then boot your smartphone into recovery mode by pressing Volume Down + Home button + Power button and then selecting the recovery option from the next screen; In recovery, you can use the Volume Keys for navigating between options and Power or Home Key to select a specific option;
- A Nandroid backup of your existing ROM should be performed; for that you should select Backup and Restore, then on the next screen, select Backup again. Go back to main recovery menu after backup is complete;
- Then select ‘wipe data/factory reset’ and ‘Yes’ on next screen to confirm your action. After a few minutes this data wipe will be complete;
- Now select wipe cache partition and after wiping process done, select ‘Wipe Dalvik Cache’;
- Go back to the recovery menu for selecting the Install option. Choose the ROM File and install it and only after that also choose the GAPPS File;
- Return to the main recovery menu and select ‘reboot system now’; after that, your Sprint Galaxy Note 3 will boot up into Android 4.4.2 KitKat (this could take longer than usual, but only because it’ the first time).
What do you think about this process? Is it a difficult one? Don’t hesitate to leave a comment if you face any problems during or after this ROM has been installed on this Samsung Galaxy Note 3 version and we’ll be there to help you.

